Mastering the Art of Caulk Removal
Are you tired of looking at the unsightly cracks around your bathtub or windows caused by old caulking? Don’t worry, we’ve got you covered! In this article, we will guide you through the art of caulk removal, helping you say goodbye to those cracked seals for good.
Removing old caulk might seem like a daunting task, but with the right techniques and tools, you can achieve professional results. Whether you plan to recaulk your bathroom, kitchen, or any other area in your home, mastering the process of caulk removal is the first step towards a flawless finish.
We will share expert tips and tricks to ensure a smooth caulk removal process without causing any damage to the surrounding surfaces. From identifying the right type of caulk to using effective removal methods, we’ll cover it all. So, say goodbye to those ugly cracks, and get ready to transform your space with a professional caulking job.
Get ready to learn the secrets of achieving a seamless and durable seal. Let’s dive in and master the art of caulk removal!
The Importance of Caulk Removal
Caulk plays a vital role in maintaining the integrity and appearance of your home. Over time, caulk can become cracked, discolored, or even moldy, compromising its effectiveness. Removing old caulk is crucial before applying fresh caulk to ensure a clean and long-lasting seal. By taking the time to properly remove old caulk, you’ll prevent water damage, improve energy efficiency, and enhance the overall aesthetic of your space.
Signs That Caulk Needs to Be Removed
Before diving into the caulk removal process, it’s important to identify when caulk needs to be replaced. Look out for signs such as cracks, gaps, discoloration, mold growth, or a peeling seal. These are indications that the caulk has deteriorated and should be removed and replaced promptly. Neglecting to address these issues can lead to more significant problems down the line, such as water leaks or increased energy costs.
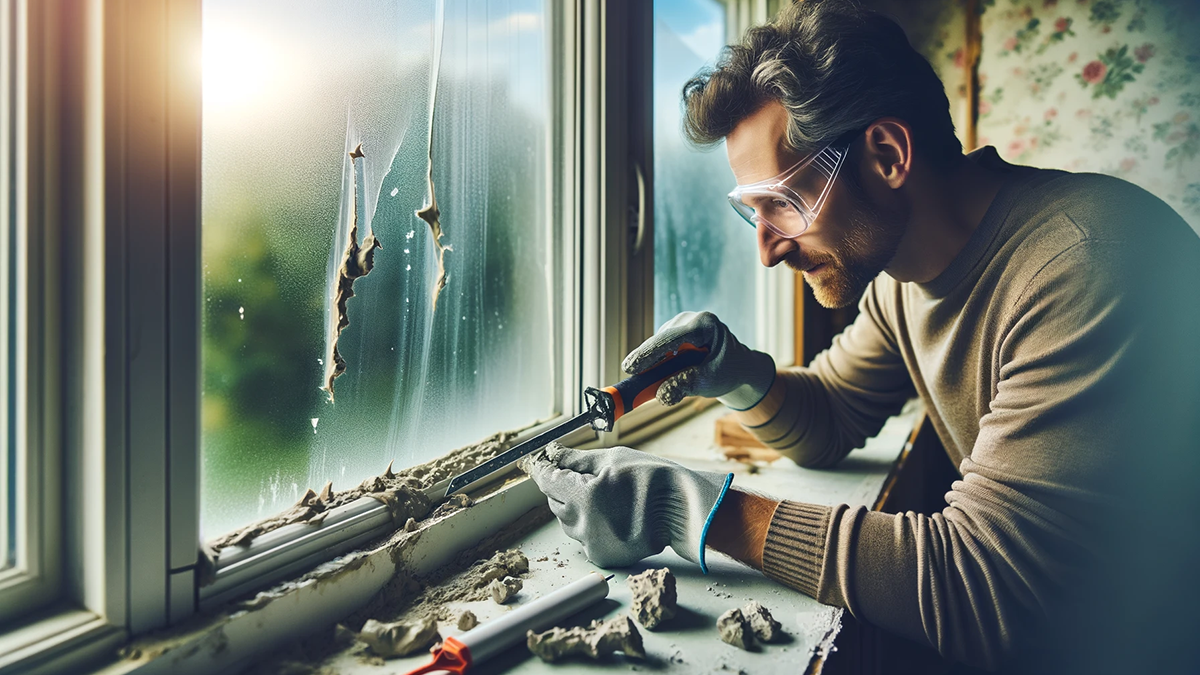
Tools and Materials Needed for Caulk Removal
To successfully remove old caulk, you’ll need the right tools and materials. Here’s a list of essential items you’ll need:
1. Caulk removal tool: This specialized tool helps to scrape away old caulk without damaging the surrounding surfaces. Opt for a tool that has both a scraper and a caulk remover, allowing you to tackle different types of caulk.
2. Utility knife: A sharp utility knife will come in handy for scoring and cutting through stubborn caulk.
3. Safety goggles and gloves: Protect your eyes and hands from any potential injuries by wearing safety goggles and gloves.
4. Adhesive remover: In some cases, adhesive residue may be left behind after removing the caulk. An adhesive remover will help dissolve any remaining residue for a clean surface.
5. Clean cloths: Have a few clean cloths or rags on hand to wipe away debris and excess caulk.
6. Rubbing alcohol: Use rubbing alcohol to clean the surface before applying new caulk. This will ensure optimal adhesion.
Step-by-Step Guide to Removing Caulk
Now that you have the necessary tools and materials, let’s dive into the step-by-step process of removing old caulk:
1. Prepare the area: Clear the surrounding area of any personal belongings or obstacles. This will give you a clear workspace and prevent any accidental damage.
2. Score the caulk: Use a utility knife to score along the edges of the caulk. This will help loosen the caulk from the surface and make it easier to remove.
3. Apply heat: If the caulk is particularly stubborn, you can use a heat gun or hairdryer to apply heat to the caulk. The heat will soften the caulk, making it easier to scrape away.
4. Use the caulk removal tool: Hold the caulk removal tool at a 45-degree angle and begin scraping away the old caulk. Work slowly and carefully to avoid damaging the surrounding surfaces.
5. Clean the area: Once you’ve removed the majority of the caulk, use a clean cloth or rag to wipe away any debris and excess caulk. You can also use rubbing alcohol to clean the surface thoroughly.
6. Remove any remaining residue: If there is still adhesive residue left behind, apply an adhesive remover and follow the manufacturer’s instructions. Use a clean cloth to wipe away the dissolved residue.
7. Inspect the area: After removing the caulk, inspect the area for any remaining traces of caulk or adhesive. If necessary, repeat the removal process until the surface is clean and smooth.

Tips for Successful Caulk Removal
To ensure a successful caulk removal process, keep the following tips in mind:
1. Be patient: Removing caulk can be a time-consuming task, especially if it’s old or stubborn. Take your time, work carefully, and avoid rushing the process.
2. Work in sections: Instead of trying to remove all the caulk at once, work in small sections. This will make it easier to control the removal and prevent any accidental damage.
3. Use proper technique: Hold the caulk removal tool at a 45-degree angle and apply consistent pressure while scraping. This will help prevent gouging or scratching the surface.
4. Apply heat if needed: If the caulk is not coming off easily, apply heat using a heat gun or hairdryer. Be cautious not to overheat the area, as it can damage the surface.
5. Take breaks: Removing caulk can be physically demanding. Take breaks as needed to prevent fatigue or strain.
Common Mistakes to Avoid During Caulk Removal
While removing caulk may seem straightforward, there are some common mistakes to avoid:
1. Using improper tools: Using the wrong tools can lead to damage or ineffective removal. Invest in a quality caulk removal tool and avoid using sharp objects that can scratch or gouge the surface.
2. Skipping the scoring step: Scoring the caulk before removal helps to loosen it from the surface. Skipping this step can make the removal process more difficult and time-consuming.
3. Not wearing protective gear: Safety goggles and gloves are essential when working with caulk. Failing to wear protective gear can result in injuries.
4. Neglecting to clean the surface: Before applying new caulk, it’s crucial to clean the surface thoroughly. Failing to remove debris or residue can affect the adhesion of the new caulk.
How to Prepare Surfaces for Recaulking
Once the old caulk has been successfully removed, it’s important to prepare the surfaces before applying new caulk. Here’s how to do it:
1. Clean the area: Use a mild detergent or cleaner to remove any dirt, grease, or mould from the surface. Rinse thoroughly and allow the area to dry completely.
2. Remove any remaining residue: Inspect the surface for any remaining adhesive residue. Use an adhesive remover and a clean cloth to dissolve and wipe away the residue.
3. Sand the surface: If the surface is rough or uneven, lightly sand it to create a smooth and clean surface for the new caulk.
4. Apply a primer (if necessary): In some cases, applying a primer before caulking can improve adhesion and ensure a longer-lasting seal. Check the instructions on your caulk to determine if a primer is recommended.
Choosing the Right Caulk for Your Project
Choosing the right caulk is essential for achieving a durable and long-lasting seal. Consider the following factors when selecting caulk for your project:
1. Type of caulk: There are several types of caulk available, including silicone, acrylic, and polyurethane. Each type has its own set of properties and is suitable for different applications. Consider the specific needs of your project before choosing the type of caulk.
2. Water resistance: If you’re caulking areas prone to water exposure, such as bathrooms or kitchens, opt for a caulk that offers excellent water resistance. This will prevent mould growth and ensure the longevity of the seal.
3. Colour: Choose a caulk colour that blends seamlessly with the surrounding surfaces for a professional and aesthetically pleasing finish.
4. Flexibility: Select a caulk that offers flexibility to accommodate any movement or expansion in the area. This will prevent cracks or gaps from forming in the future.
Proper Caulk Application Techniques
Now that you’ve mastered the art of caulk removal and selected the right caulk for your project, it’s time to apply the new caulk. Follow these steps for a successful caulk application:
1. Cut the caulk tube: Cut the tip of the caulk tube at a 45-degree angle to create a small opening. The size of the opening will depend on the width of the joint you’re caulking.
2. Load the caulk gun: Insert the caulk tube into the caulk gun, ensuring it is securely in place. Squeeze the trigger until caulk begins to flow.
3. Apply the caulk: Hold the caulk gun at a 45-degree angle and apply a steady bead of caulk along the joint. Use consistent pressure to ensure an even application.
4. Smooth the caulk: Use a caulk smoothing tool or a wet finger to smooth the caulk and create a clean, professional finish. Wipe away any excess caulk with a clean cloth.
Conclusion: Enjoying a Clean and Professional-Looking Seal
By mastering the art of caulk removal, you can say goodbye to old, cracked seals and enjoy a clean and professional-looking finish. Remember to follow the step-by-step guide outlined in this article, use the right tools and materials, and take your time to achieve optimal results. With proper caulk removal and application, you’ll not only improve the appearance of your space but also ensure a durable and long-lasting seal. Say goodbye to those unsightly cracks and hello to a beautifully sealed environment!
Contact General Seal Today for your Caulk Removal projects